Friday, February 22, 2013

Hobbit Detour

Is not like I haven't been cooking.

I took a minor detour this past week. My son celebrated his 11th birthday and only having one (indulged) child, we spent the entire week partying. His official party was Hobbit themed and we went all out! The house was transformed into Bilbo's house, The Prancing Pony, and kinda Middle-Earthy. He invited four of his best buds for a sleepover, but we had Moms, Dads, and siblings come for a proper pre-sleep Hobbit Feast.
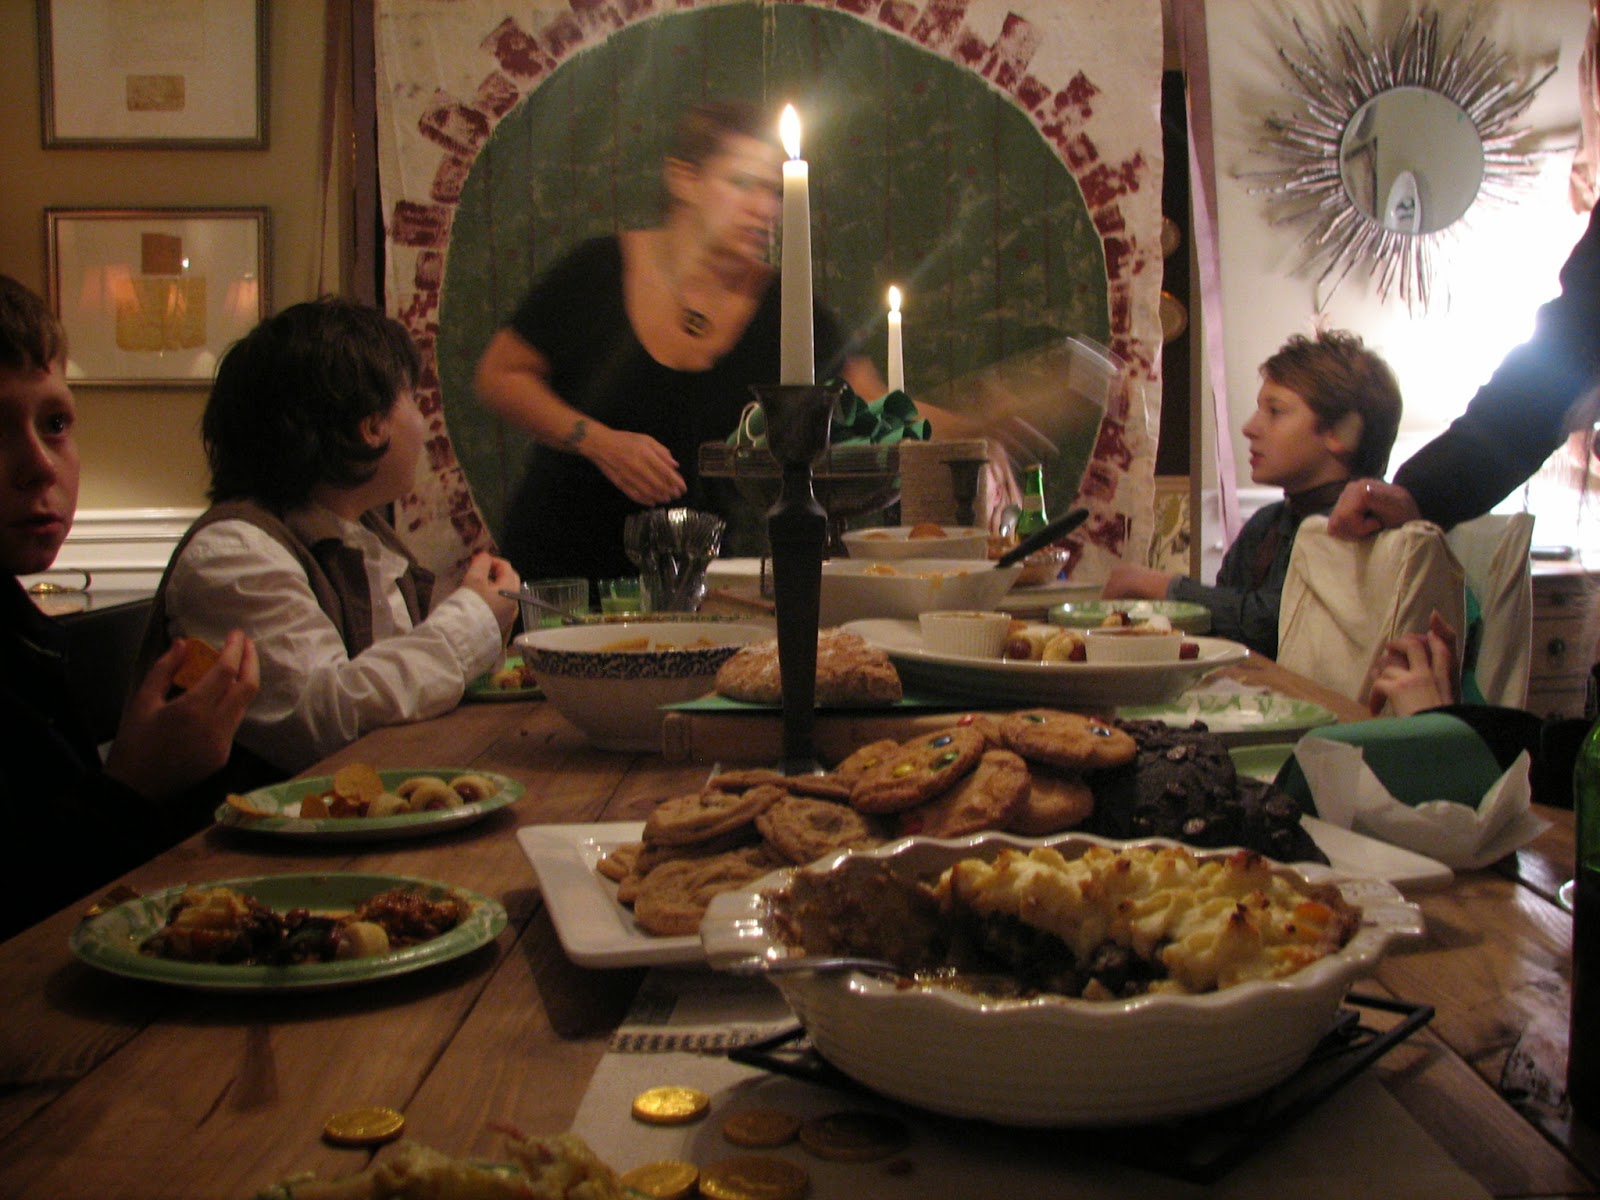
That is my lil Bilbo on the right

Hobbits eat. And eat (seven meals a day! Go Hobbits.). Which made planning the party quite challenging.  I relied on some very knowledgeable friends and my super-sweet brother in law for the "rules" on what and how to serve. Here was the lineup:

First Breakfast- Egg, Bacon & Cheese Quiche
Second Breakfast - Apple Caramel Pie
Elevensies- Creamy Stuffed Mushrooms
Luncheon- Cold Potato Leek Soup & Tomato, Cucumber & Feta Salad
Afternoon Tea- Assorted cookies and Sweet Tea
Dinner- Mini Sausages Wrapped in Pastry and Tater Tots
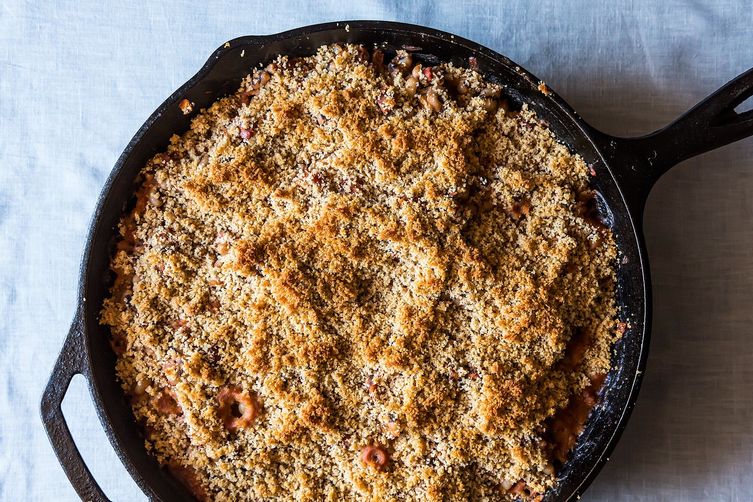
Supper-Coney Stew (which was Sheppard's Pie in disguise)

In addition we added Lembas bread (an Elven creation prominent in the LOTR series wrapped in leaves. I used a soda bread recipe of Jacque Pepin's), chili bean dip & chips, and  Ms. Dupree's Pimento Cheese that I highlighted in my first ever post!

My boy's mile high birthday cake was constructed out of two recipes from Mastering the Art of Southern cooking: Damon Lee Fowler's Updated 1-2-3-4 Cake, and Cream Cheese Frosting. I created a Hobbit door and "No Admittance Except Under Party Business" sign out of fondant and food coloring to top the cake. The cake was so luscious! The crumb was tender but firm enough to easily frost. The flavoring was that of a light vanilla pound cake. The frosting is a perfect combination of buttercream and cream cheese frostings-not too sweet and not too heavy but with a lovely shine and body. The technique for the cake involves patience (long creaming time, etc) but is otherwise a simple task. The recipe will yield 3 -9" inch cakes, perfect for a big, old fashioned birthday cake.


Just made it with the candles thisclose


Acting the fool, as usual.


This is the third time I have used the Updated 1-2-3-4 recipe and I love it. I have made another birthday cake (with the caramel frosting from Mastering...oh. my, goodness. That will have it's own post.) I also made cupcakes for the birthday fella this week. We kept with the LOTR/Hobbit thang and did "Precious" cupcakes for his class. The rings were again, fondant. I used an edible gold dust to give it some glitter. The kids were all too excited to eat the jewelry.


Precious 
The party was an absolute blast and the food was a hit. The Lembas was terrific and I am including it's recipe below. I remember seeing Jacque Pepin make this bread years ago on PBS. It's a cinch to make and yields a crunchy crust with a fluffy center. The key is to bake it with a lid (an inverted stainless bowl is suggested) but I improvised by baking the loaf in my Le Creuset chicken fryer with lid. The lid adds some lightness to the soda bread, which can often be quite dense and dry. Just out of the oven, it cannot be beat with a slather  of butter. My son loved it with some jam the next day, toasted well.

Sadly, I don't have great photos of the cake and event in general. I was too busy cooking, serving, and acting a silly Mom-fool. With 25 guests, we were swamped! The cake was out of this world, thanks to Mastering the Art of Southern Cooking.

I promise to get back on my game this week and make some special dishes from MTAOSC. I have Country Captain on the brain and Ms. Dupree's version is hands-down the best I've ever tried.
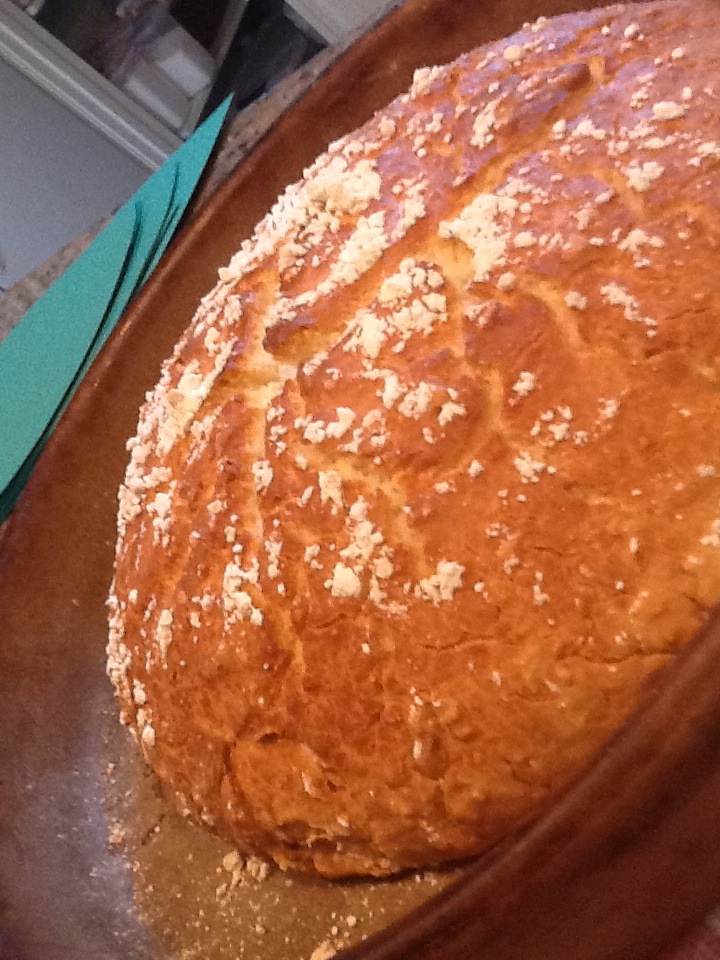
Lembas

Jacque Pepin's Quick Soda Bread


3 cups all-purpose flour
1 1/2 teaspoons salt
1 1/2 teaspoons baking powder
1 1/2 cups milk
1/2 teaspoon canola oil (I am on an organic palm oil kick, which I used very successfully)
Preheat the oven to 425 degrees.
Reserve 1 teaspoon of the flour, and combine the remaining flour with the salt and baking powder in a large bowl. Add the milk and mix gently but quickly with a wooden spatula or spoon until the dough comes together.
Oil a nonstick cookie sheet with the canola oil (or line a regular cookie sheet with parchment and brush with the oil), and place the dough on the sheet. Using a piece of plastic wrap, press and mold the dough to create a round loaf about 7 inches in diameter and 1 inch thick. Sprinkle the reserved teaspoon of flour on top of the loaf. Using a serrated knife, make 2 intersecting 1/4-inch-deep cuts across the top of the loaf to create a cross.
Place a stainless steel bowl upside down over the bread and bake for 30 minutes. Remove the bowl and bake for another 30 minutes, or until golden brown.


You sexy thang
** I oiled my Le Creuset deep covered saute pan and baked right in it. LOVE this thing! It was a gift from my sister and and best BIL. 
Using a wide spatula, remove the bread to a rack. Let cool for at least 30 minutes before slicing.
-Jill


My wonderful friends who truly inspired our day. They are HARDCORE!!!


Here is their AMAZING vacation video. They did this ALL!!


Sunday, February 3, 2013

Cassoulet Part Deux

Our Dixie Cassoulet was So. Dang. Good.

My husband just confirmed this by reminiscing about Friday's meal with a glazed look of a smitten man. He told me that he's so excited because we get to have leftover cassoulet for dinner all week. If you have ever had cassoulet then you know that the only thing better than cassoulet is leftover cassoulet.

My camera has bitten the dust so the pics are via my phone. The thing is, cassoulet has a face only a mother could love anyway, so it's really just fine. I didn't get a pic of the completed, crusted cassoulet either. Boo, so I borrowed one from Food52. I very was busy serving and my good friend Lynn decided to bring an organic cucumber vodka for our before dinner cocktail, so by dinner time I was a very relaxed.

My sweet husband built me my dream dining table!
We started the meal with a simple chicory salad with a vibrant dijon vinaigrette and a bit of shaved Kerrygold cheddar. It was nice and tangy and got the juices flowing for the cassoulet. I was able to use my beloved earthenware cassoulet server (that I scored at Habitat for Humanity ReStore for $3-new!) and serve on our new farm table that my husband built for me for Christmas. The vibe was so right and it felt as though we were transported to a French country home. Food can do that for me, take me places.

Beautiful chicory for the salad
The cassoulet was wonderful. We broke through the garlicy breadcrumbs and through to steamy beans that was studded with the most delectable chunks of garlic sausage, confit, pork ribs.  I served a small ramekin of the confit "butter" on the side to drizzle a top, or dip some fresh bread. I absolutely adored the black eyed peas as a white bean substitute! The dish was still so creamy but the black eyed peas had a nice, teeny tiny bite to them that I really loved.

Our dessert was slated to be Chocolate Pecan Pie but after a polling of my friends and considering my Dad's diabetes, I chose a lower sugar dessert. Ms. Dupree's Caramel Cream Pecan Crust Pie (pgs. 527 & 514) was INSANE. A short crust of pecans, flour, butter, and a bit of sugar are pulsed into a dough, pressed into a pie pan with a removable bottom and baked. The filling is like a panna cotta-gelatin is bloomed in warm cream, a caramel is made and mixed into cream and poured into the shell and cooled. The crust recipe alone is worth running to buy Mastering the Art of Southern Cooking right now! I did have to bake a little longer than suggested, but my oven is bi polar. I cut back a bit on the sugar in the crust (for my Dad) and made a quick caramel sauce to drizzle over top for my other guests and myself. This one will have a post all it's own, it is THAT GOOD.

It was a night of stories and laughter and great food shared with people I love.

I certainly used Dixie Cassoulet from Mastering the Art of Southern Cooking as my template, but went a bit off with some extra additions. Here is the final recipe. Daunting as it may seem, each element is a meal in itself and holds beautifully until you are ready to assemble. I did make my ribs well in advance (four days ahead).

Ode to Dixie Cassoulet
Serves 10-15
Freezes perfectly. Feel free to divide the recipe into oven-ready vessels and freeze right in them! You can save the breadcrumb step for when you pull one from the freezer.

1 recipe simple beans (Simple Beans)
1 recipe confit chicken thighs from (Confit on the Cheap (Cassoulet Pt. 1) skin and bones removed, meat pulled into bite sized chunks
2 cups homemade stock, nice and strong (I made turkey stock from my leftover Toikey!)
2 cups white wine
2 Tablespoons tomato paste
1 1/2 lbs garlic sausage (I have successfully used expensive French style garlic sausage, Bangers from Whole Foods-awesome, and Boar's Head bratwurst in a pinch. All excellent!)
2 lbs. country style pork ribs*** I recommend preparing the ribs well in advance to save on time!
2 Tablespoons fresh parsley, chopped
5 cups panko breadcrumbs
3 cloves garlic
1/2 cup drippings/preserving fat from the confit

Preheat oven to 350 degrees.

Put the stock, wine and tomato paste in a large pot over medium high heat and dissolve the paste well. Let simmer 15 minutes. Remove from heat. Set aside.

Prick the sausages, put in a saute pan with touch of oil and brown well. Remove from pan, slice into bite sized chunks. Set aside.

***Season pork ribs well with salt & pepper. Sear in a hot pan with a bit of oil until golden on all sides. Place the ribs in a roasting pan with 3 cups of chicken or beef stock, cover with foil and roast until tender, about 1.5-2 hours.  Let cool, remove from bones & cut into bite sized pieces.

This can be a great meal in itself! Double the amount of ribs (and liquid to braise). Set half aside for your cassoulet and douse the rest with your favorite bbq sauce (hoisin is excellent here as well!) and put back into a HOT oven (500 degrees) and let the ribs glaze well. You'll have dinner tonight and be ready to go for your cassoulet at you leisure.***
Browning the ribs

In a sauté pan add confit drippings/fat and garlic, sauté until softened. Remove from heat and stir in the panko. Add salt, pepper & fresh parsley. Set aside.

Third layer before the breadcrumbiness
Organize your assembly line: Beans, shredded confit, sliced sausages, stock mixture, and breadcrumbs. Grease a large vessel (6-8 qts) with a bit of the confit fat. Begin the layering process: beans, sliced sausage, confit, pork, a cup of the stock mixture. I did three layers and topped with half of the flavored bread crumbs. Place into the oven and bake uncovered until the crumbs really begin to crust and brown (about 30-45 minutes). Take a spoon and gently press the crumbs into the cassoulet. Cover with the remaining crumbs, dribble with a bit of the drippings and bake until golden (takes about 45 minutes). Whew! That is it. Oh my word, this is good.

Note: You can do the breadcrumb step as many times as you like. If your cassoulet is a bit too soupy for you, add another layer of crumbs and push away!

This mostly closely resembles our finished dish. Break on through.

Thanks for taking the cassoulet ride with me. Tonight is "the big game" (oh, I hate that name) and we are having chili. Simple. One pot. Yum! It doesn't always have to be a lengthy process. Sometimes it's just plain ole good eatin'.

-JCG


Thursday, January 31, 2013

Simple Beans

There are quite a few steps in making cassoulet. This week I have made confit of chicken, simmered a big pot of turkey stock, and braised some country pork ribs. Today I made a simple pot of beans, the backbone of a hearty cassoulet. Today was easy peasy.

Traditional cassoulet calls for French beans or Great Northern White beans. I am mixing it up a bit, staying French but adding Charleston charm with black eyed peas and black beans. See, I needed two pounds of beans. I had a pound and a half of black eyed peas and a half pound of black beans. With no interest in heading to the grocery store, my cassoulet is getting colorful. Cassoulet is not known for it's beauty. It's a rather boring brown mass but, ohhh what lies beneath that beautiful breadcrumb crust! So, I didn't feel to bad adding a few black beans that will discolor mix.

Mastering the Art of Southern Cooking uses both a quick method for black eyed peas (pour boiling water of the beans and soak 1 hour) and a long soaking method. I prefer the results of a long soak. I combined the flavoring methods of both the recipes in the book for this recipe, and tweaked a bit with the bay leaf.

The Good Luck Bean 
Beans are so simple. Sure, a can of beans is even simpler but why not go for it once in a while? It's not a bit difficult and the results will make you proud.

This is it.

(Makes a very large quantity that freezes beautifully!)

2 lbs, dried black eyed peas or a mix of black eyed peas a black beans
1 large onion, quartered
1 sprig of fresh thyme
1 bay leaf
3 rashers of bacon or 1/4 lb hog jowl, roughly chopped (optional*)
1 dollop of Sriracha (I'd go a tablespoon, but just a touch will make a difference)
fresh cool water to soak and cook
salt & pepper

Place the dry beans on a tray and pick through, Beans can have "debris" such as small stones and grit so spreading them out make picking through a bit easier. Rinse in a colander and place in a container that will fit comfortably in your refrigerator. Cover the beans with cold water (go about 2 inches above) and store overnight. The beans will plump considerably. There is some debate over the need to long-soak black eyed peas. I prefer the texture of the beans that have plumped overnight, plus I think they look wonderful. If you forget, a quick method will do.

Drain your beans. Yes, there is debate over this step as well (beans are antagonistic). Folks say draining and starting with fresh water helps reduce the unwanted effects of eating beans, I believe them. I know their good for your heart and all, but I'm having guests. I drain very well and cover with fresh cool water (go about an inch above the beans). Add the onion, thyme, a bay, bacon or jowl (or ham hock!) and Sriracha. I don't salt until the beans are nice and soft. I have had the miserable experience of salting at the beginning and my beans never softening. So frustrating.

Bring the pot to a gentle boil, lower the heat to a slight burble. Taste test after 30 minutes. Depending on the bean's (beanses, in Hobbit speak) freshness of it could be anywhere from 30 minutes to 1 1/2 hours of cooking time. There will be funky foam that rises to the top, just skim this off. You want a nice, creamy texture. Salt & pepper to taste. Allow to cool in their liquid. I serve the beans in their liquor. You can scoop out with a slotted spoon, or drain if you prefer.

*This makes a great vegan/vegetarian dish without the pork. I have heard using an all-natural liquid smoke product, like Lazy Kettle, yields a really yummy substitute for the bacon, jowl, or hock.

(Having some uploading issues. Don't have much beauty to show. Trust me, the beans are so good.)

Served some with a riff on a Chicago style dog. Don't get crazy. I said riff! We love the all-beef uncured hot dogs from Trader Joes. I split the big dog, added sliced tomato, sliced pickle, thinly sliced aged cheddar, a crisp rasher of bacon, a leaf or romaine and some brown mustard.  This was a great combo with the beans. Funny, my husband loves cassoulet and "upscale food", etc. but he was hounding me about posting the hot dog pic. He loved this easy meal. Please accept my apology for the pic. I am doing research on how to make them better. That is one seriously unflattering photo. Chin down, beans! To the left, hot dog! Suck it in pickle! Say, "cheese!", um, cheese.

Worst Pic Ever Taken

It's almost Friday. I am so excited to celebrate and eat a memorable meal with some memorable people. Oh, and there will be Chocolate Pecan Pie from Mastering the Art of Southern Cooking for dessert. Sweet.

-JCG


Tuesday, January 29, 2013

Confit on the Cheap (Cassoulet Pt. 1)

Crispy Confit on the Cheap

This is a somewhat nutty entry. It's about confit and it's about Nathalie Dupree (hey, that rhymes). Mastering the art of Southern Cooking doesn't include a confit recipe, it has a Cassoulet recipe. A Dixie Cassoulet. That Dixie cassoulet does not contain confit. Did I lose you yet? Cassoulet is a well-debated dish. What it is brimming with depends on the region, the cook, the availability, the inspiration. My inspiration for this week's cooking is a absolute favorite quote of mine.

"Just make something that tastes good."

Ms. Nathalie said this, and I remember hearing it like it was yesterday. She said it during an episode of her PBS program from way back, but I remember. 

I took that notion with me through years of professional cooking, and now, cooking for simple pleasure. 

"But the confit?" you ask. Well, I love it. Especially in cassoulet (ta-DA). I think it just tastes good.

My first introduction to Nathalie Dupree was through her cooking programs that aired in the 80's and early 90's. I was a teenager who loved cooking. My Mom was a professional chef and my house was filled with wonderful food and smells almost all of the time. When I wasn't helping my Mom with her catering business, I was watching food shows on TV. There was no Food Network, it's was public television that brought out the greats: Graham Kerr, Madeline Kamman, Jacques Pepin, Pierre Franey (who's voice made me giggle!), Justin Wilson and many more.

Ms. Dupree in Charleston
My favorite was always Nathalie Dupree. She was so lovely, relaxed, funny, sweet, and Southern. She rolled with it! These were the days before slick editing and big  money productions. She was taped live, and well, stuff can happen! If the hot lights melted her pie dough, she smiled and plowed through. If she omitted an ingredient, she went back and owned up ("Silly me, I forgot the onion. You won't forget the onion, you'll be perfect" said with a sly smile).  She did what we would all have to do, and made it work. It's amazing what she could fit into a 25 minute segment. Full meals, starter to dessert, even fresh breads."The dough will feel like a baby's bottom." she would say. Totally does. And when she took on Cassoulet in a single episode, I was glued to my parent's Ethan Allen wingback, about to get schooled.

I knew about famed Cassoulet. I was born a Julia Child groupie, after all. This was the stuff of real French cooks: days of preparation, pots and bowls everywhere and serious mise en place. This was going to be really good. And it was. Sausage, duck, lamb, beans, vegetables and that incredible crusty topping. How she managed to get it all in was amazing. Here was this calm, charming, sweet-as-pie Southern lady taking on the King of all French recipes. It was the coolest! I usually had a pen and some paper near the TV to painstakingly copy down recipes as they were being prepared (this was a very long time ago,  you youngin!)  Or, I could wait until the end of the program when a voice would provide an address to send a SASE (self addressed stamped envelope) and an episode number to refer to for a copy of the recipes. I tried to write this one down but I think I got too mesmerized and hungry. Finding the episode on youtube was like striking oil (or duck fat, hehe).  I dare you not to have a
screaming stomach by 14:30.


Cassoulet is not Southern. Nathalie Dupree was classically trained, a  Le Cordon Bleu graduate! Many of her recipes include French techniques and sensibilities, but it's the Southern charm that always shines through, making seemingly impossible dishes a possibility. Her spin on Cassoulet in Mastering the Art of Southern Cooking is genius. It is a scaled down method utilizing readily available ingredients. She substitutes black eyed peas for French white beans and replaced garlic sausage with the Italian variety. She took her original flourished PBS version and made it an easy Southern supper.

It's been many years, but when I purchased Mastering the Art of Southern Cooking in November it reminded me of my PBS addiction and obsession with cassoulet. I decided to make the dish for a special celebration this week (Happy 47th Mom and Dad!). I used the recipe as inspiration but want to stay closer to the French origins for the evening. I'm not sure what will be more fun, eating it or the challenge of creating it. A week of soaking and cooking beans, braising meats, chopping vegetable, making gallons of stock is something I get jazzed about (I know I'm a freak to some, bear with me).

Then there is the confit. Oh baby, the confit. 

Confit is essentially salt curing and slowing cooking in fat. Traditionally it is duck legs and duck fat rendered from the rest of the bird. Obviously this began as a perservation method but we humans have been smart enough to realize that some things are just meant to be. It is striking to see the drumstick popping up through the partially opaque, partially transparent fat. If the thought grosses you out, go no further. You are not allowed in the club.

Slightly Cooled Confit (in my favorite bean pot!)
I considered making duck confit but cost was prohibitive and my husband and father are "eh" for duck. Using reasonably priced chicken legs makes enjoying the most luscious meal a no-brainer. Well some brain is required as there is a lengthy curing process and a super long slow cook in the oven. It's really very simple, it just takes time. Replacing the rendered duck fat with olive oil will certainly make things easier.

This method involves sandwiching chicken legs with garlic, thyme, bay leaf, and salt & pepper. The legs are left to marinate/cure overnight. The chicken is rinsed, placed into a heavy vessel, and covered with olive oil. I don't recommend using expensive extra-virgin olive oil for this. A nice light, reasonable olive oil will do really well absorbing all the flavors of the chicken, garlic, and herbs. After 10 hours in a 225 degree oven you have something so special! Crisp up the skin to a golden brown and serve or remove the cooled meat and add to cassoulet--or anything for that matter. The now-infused olive oil can be strained and saved. It makes everything it touches more delicious. Fry an egg, sautéed potatoes (audible sigh), dip toasted bread...outstanding.

I've talked about aroma before. It's it's very important to me that when guests walk in they start to spontaneously salivate. This one is SO incredible when cooking (and I decided to cook overnight) that it permeated my dreams and I woke hours earlier than needed to a rumbling stomach.

**While a dozen legs were lovingly braising away in the oven yesterday, my son (we'll call him Pavlov)  came in from school and his nose shot into the air like a puppy.

"Can I have a snack?"

I'm training him young. That is how you want people to react when they enter your home. Spontaneous
salivation. **

I served half the legs with a super-bright and acidic salad to balance the rich fattiness of the chicken. Some nice bread and that is it! You have a royal meal. The best part? The remaining legs will end up in Friday's cassoulet! Yahoo!

Confit of Chicken Legs

Serves me
(I kid. Serves four)

4 chicken legs with thighs, skin on 
1 head garlic, separated into cloves and peeled 
4 bay leaves
6 sprigs thyme
1 Tablespoon Kosher salt
Fresh ground pepper to taste
1 tablespoon whole peppercorns
4 cups good olive oil

Preheat oven to 225 degrees

Lay two rinsed and dried chicken legs, skin down in a glass baking dish. Place garlic cloves, bay leaves, and thyme evenly over the meat. Season well with salt and pepper. Layer the remaining chicken on top, skin side up (mirrored) and sprinkle with a bit more salt and pepper and a couple of thyme sprigs. Cover tightly with plastic wrap and refrigerate overnight. 

Bottom Layer, skin down
Top Layer, skin up

Unwrap chicken and remove garlic & herbs to the bottom of a heavy oven proof vessel. Sprinkle on the peppercorns. I used both a LeCreuset chicken fryer and a ceramic "lasagna pan" to accommodate the legs, as I tripled my recipe. Both worked wonderfully! 

Rinse the chicken under cool water and dry well. Place into your pan atop the garlic and herbs, skin side down. Pour the oil over the chicken and cover tightly. Bake for 10 hours, your chicken will all but fall apart when you tug on a leg.

An Olive Oil Bath
Let cool a bit.The chicken will firm up and be much easier to handle-but who cares if it falls apart? As my dear, late father-in-law would say, "it's all going da the same place." He was a New Yorker :)

Still Warm Confit Landscape
Strain the fat and place into an airtight container. Float the chicken in the fat where it will remain absolutely delicious for at least a month covered well in the refrigerator. I set a jar of the strained fat aside for sautéing, etc. If you are eating your legs right away, you can let them drain on a wire rack over a baking sheet before crisping. 

Well Cooled, Well Preserved
Heat a nonstick or well seasoned pan over medium high heat. Sear the chicken skin side down until crisp. I've also broiled the legs very successfully!


I thank my fellow Charlestonian, Ms. Dupree. I am having such a fun week preparing for Friday's feast. My cassoulet will have pork ribs, confit of chicken legs, garlic sausage, and black eyed peas! I'm thoroughly enjoying every step and not sweating if it isn't perfect. I'm inspired.


JCG


Thursday, January 24, 2013

Toikey!


Attempt at a beauty shot. 
You cut da toikey???
I'm finding the most difficult part of my new endeavor to make all the recipes in Mastering the Art of Southern Cooking is not in the prep, or clean up, or the punctuation (tee hee) but in the getting my arse to the market for ingredients. I'm not a big planner, so I peruse my big, heavy book each day and see what grabs me. Then I have buy stuff. I also have to work, so finding the time and excitement to head to the store is tough.

In an effort to save some dough and avoid a grocery trip, I raided my freezer and pantry to find inspiration. My sweet Dad (my Mom is very sweet as well. Nailed it.) works at Trader Joe's and was given a Kosher turkey as a gift after the holiday rush. My parents didn't have freezer space so that bird has been glaring at me for a month or so. I decided to take it out and let it thaw on Tuesday night to enjoy on Wednesday evening. For me this was big planning! I left it in the fridge overnight and thawed the rest of the way in cool water in the sink. It was a 13 pounder, not too difficult to handle or defrost.

Buttered and seasoned
After thawing, this bird needed some lovin'. Kosher turkeys are really yummy but they always seem to have a LOT of stray feathers/quills to pluck. This is a grody task. I'm really not squeamish but there is something all too real about plucking feathers. I have a "tool kit" for this type of hiccup. Needle nosed pliers work really well for plucking feathers and deboning fish, so I have a pair for kitchen jobs only ("impeccable clean, I say!"). I've heard that you can torch off the remaining feathers and quills but I have not tried it. TJ's brand also removes the wing tips from bird. I was bummed, I love the look of the tips bent back under the bird and it keeps the turkey nice and level for carving. Hey, it was free. I can't complain (anymore). I decided to use some twine to secure the wings to the bird so it wouldn't be all splayed out once roasted.

In MTAOSC (pg. 374) there is roasted turkey recipe that has some interesting methods that make for a better bird. A nice high heat (450 degrees) and roasting breast down for the first hour aren't huge news, but I do think they made for a quick and savory turkey. Allowing the bird to chill in the fridge (uncovered) provided a nicely crisped skin. After stuffing the cavity with quartered onion, carrot and and some fresh rosemary and thyme (that had seem much better days), I trussed the legs together. The turkey is coated with a combination of melted butter and olive oil (cook's choice, I combined), going heavy on the breast area. The recipe didn't indicate seasoning the outside of the bird but I liberally salted & peppered.
Catch you on the flippity flip

I have a well-used and loved roasting pan that my husband and I received as a wedding gift over 16 years ago. It was a gift from our wonderful friends Carole & Jim. Every time I use that pan (and I do very often) I think of them. It makes me very happy. They are back in NY, probably freezing right now (ha!). It came with an excellent rack insert (teflon coated, no sticking bird and ripped skin!) that I love. I'm not a big nonstick fan but the rack is nifty.

The bottom of the pan also gets quartered onion and carrot and apx 4 cups of chicken or turkey broth (you want two inches of liquid, so this will depend on your pan size). The bird is placed on the rack breast down a popped in the hot oven. After one hour, flip the bird (carefully!) and in it goes for another hour. If you see the breast is browning too quickly, cover lightly with foil. Keep and eye on the liquid in the pan and add more when necessary to keep the 2 inch level.
Post flip farmer's tan

Use a thermometer at the thickest portion to be certain you are at 165 degrees. Take the bird out and let in rest before carving. With that handy rack insert, it was simple for me to remove the turkey to a rimmed baking sheet while I got to gravy making task.

I didn't take pics of my gravy procedure. I was trying to get Tom on the table before the kiddo had head to kara-tay. It has also been futile to have the kid help with picture taking. After an attempt last week, all I had was 43 shots of a dead palmetto bug. Admittedly, they were much better than anything I can do. (I'm working on it)

You have gorgeous skin!
I strained and defatted all that delicious liquid from the roasting pan. I set aside some of the fat to create a roux (I put the fat and flour right back in my roasting pan on my stovetop burner). I saved the veggies for my dog Layla's dinner. I buy everyone's love with food :) After cooking my roux well (but not browning) I added the warm, strained liquid back into the pan and whisked away (don't forget the juices under your now resting bird. Manna! I add the liquid slowly as too get the gravy to the perfect, silky and not gummy texture. If you don't use all the liquid, freeze it or save it for tomorrow's turkey soup. You could add a bit of white wine, enrich with cream etc. but this was a simple turkey for a Wednesday evening and it was already so darned good.

Lil' Turkey going for the gold. 
I had some frozen whole grain bread (that was squished by our turkey friend) that I made into a quick stuffing by cubing and toasting well, adding sauteed onion & celery and some dried herbs. I used the pan drippings to moisten before baking until hot.

We also had (my fave) roasted halved tomatoes topped with some shredded parm, olive oil, salt & pepper. These were Kumatos from Trader Joes. I love them. They are very sweet, without much acidity, so the parmesan is really nice on them. They were super juicy and so delicious when mingling with the stuffing.

The turkey was perfect. The breast meat was juicy, the skin was crisp, the dark meat was well cooked and flavorful. The pan drippings (really, it was a pan stock!) was incredible. Worth the price of admission. I love that I didn't have to spend a day brining or fussing. A roasted turkey was doable for a mid week meal!

(The dinner could have used something green but I'll make up for that tonight with a big green salad with nuts, dried fruit, chopped turkey and cheese).

I eat carrots when they are swimming in turkey fat
It was super cool that I didn't have to head out for one ingredient and managed a rounded dinner that left me with fabulous leftovers and a carcass for more stock. My fellas were thrilled and Layla loves me more than ever! She told me. With her eyes.


Big Turkey, making gold


 Thank you Ms. Dupree & Ms. Graubart!
JCG

Tuesday, January 22, 2013

Chicken in da Pot, Chicken in da Pot


It got "cold" here yesterday and we were pissed. Our relocation from Long Island to Charleston was 90% weather related. It's not as simple as "the NY winters are really getting to me".  It's dead serious. We cannot function without warmth and sun. We are creative folk, so a day without sunshine is a day without inspiration.

The only thing I could imagine doing was getting the house warmed up with a pot of something simmering away, wafting deliciousness about the house. I have been cozying up to my Mastering the Art of Southern cooking quite a bit recently so I had a good idea of what I'd be making to cheer us up. I also didn't have a ton of ingredients and wasn't terribly inspired to head to the grocer, so the decision was easy.

Chicken and Dumplings.

Many of the dishes in MTAOSC are based in deep history. Who would think a big steamy pot of chicken and biscuit-like dough would be a classic Southern dish, with the weather typically being, well, scorching? This dish was made from necessity and frugality. One chicken could create a large and satisyfying broth to flavor the dropped dumplings to feed a large crow of hungry workers or families. The broth could simmer unattended, only to get more delicious by dumpling dropping time.

I've had a few different versions of this dish. There are the noodle-like dumplings (a Penn Dutch specialty) that are available frozen fresh in the supermarket, commercial biscuit mix varieties, broth loaded with veggies, others very straight forward deep, rich broths. I don't dislike any of them (although biscuit mixes are starting to taste just wrong to me) but this version was hands down the best. A wonderful co-worker brought me in a big container of the frozen, ribbon-like chicken and biscuits that I devoured, but I missed the chewy-tender mouthfeel of a dropped dumpling (maybe that is the matzoh ball nostalgia I have from living just two miles from Riverdale, NY for a year. Warning: don't experience your first pregnancy within a two mile radius of stellar Jewish delis. I may have broken a first trimester weight gain record. Even referred to our little one as "our little matzoh ball" or "our little latke" for quite some time). Nathalie Dupree's recipe (pg. 371) includes dropped dumplings, bursting with black pepper to add warmth without high spice.

The broth was simple: 1 whole chicken cut up, covered with chicken broth or good stock, an onion quartered, a carrot roughly chopped and a hot pepper. I was out of fresh peppers, so I put a dollop of sriracha sauce in the pot in it's place. Rooster, baby.

Dream Big and Spicy
I simmered the chicken for 1.5 hours, removed it from the pot and set it aside to cool before skinning, deboning, and shredding. I don't see why a store-bought rotisserie chicken wouldn't work here. You can remove the meat and place the bones in the stock for a while to give it good flavor. It certainly won't be as good, but it will do in a pinch!

**Note: I had a great pic of the shredding/deboning but my darling husband thought it too gnarly.**

Defat your stock by skimming well (a fat separator gadget is great for when you don't have time to chill your stock for easier fat removal) and boil it until the flavor is where you like. I like a rich stock that could stand on it's own so I boiled about 12 minutes. A cup of milk is add to enrich and now your stock is ready for dumplings!

Dumplings are simple and tough to mess up. Flour, baking powder, salt, shortening, milk & a generous grinding of fresh pepper are are they require. Maybe it's all in my head, but using the highest quality ingredients here seems to make this super-simple dumpling extra special. I use White Lily flour (a soft winter wheat), Rumford powder, and Spectrum Organic shortening. The shortening is non-hyrogenated and so clean tasting. The cost difference is minimal when using such small quantities, so splurge for you and yours. Cut the shortening into the flour, salt, powder & pepper. Add the milk ( I use raw milk--but now I'm sounding snobby) and lightly mix to form a nice, soft dough. Be heavy handed with the pepper, you will thank me. Teaspoonfuls are now dropped into the boiling stock, reduce the heat to simmer, cover, and let the dumplings plump up for 10 minutes.


Heavenly. Simple. Steeped in tradition!


Haaay Sexy
It was tough not to add neatly diced carrot, celery, and onion to this dish but it really didn't need a thing.  I was so surprised by how deep the flavor and how wonderfully textured the dumplings were. It certainly lived up to it's aroma :)


I had to get some veggies in our meal but didn't want separate dishes (we ate cuddled on the couch with deep bowls in our laps). I had a humongous bag of local kale from a roadside stand. I also still had a nice chunk of hog jowl in the freezer from New Years Day, so I decided to braise some kale to top our bowls. This sin't a recipe from MTAOSC, so I am including it for you all. It's a nice combination of my EYE-talian heritage and my newfound affinity for the South. It's a wonderful way to serve kale, which is loaded with nutrients and flavor. You can of course substitute bacon, ham, smoked turkey, or even  vegan bacon or hot dog (GASP!) for the jowl. It's there to add some additional flavor and a contrasting texture. You could omit it completely or crispy fry some shallot for crunch. Okay, sure, you can do none of the above and the braised kale will be delicious!


Braised Roadside Kale

8 cups washed & roughly chopped kale
1/4 lb chopped hog jowl (or 3 slices of bacon, or 1/4 lb of smoked ham.....)
2 garlic cloves peeled & sliced
a good pinch of red pepper flakes
Plenty of salt & pepper
1 Tablespoon olive oil

Heat a large saute pan over medium heat and add the jowl. Slowly allow it to render fat and soften, I add a couple of tablespoons of water to help the process. Once rendered and looking like blanched bacon, remove some of the fat (you can leave apx tablespoon). Add fresh olive oil and increase the heat to crisp up the jowl. Once crisp, set aside to drain and add the sliced garlic and keep it moving well around the pan, as to not burn. When the garlic has softened, add crushed pepper flakes and kale, stirring well. The kale will deflate quite a bit and be more manageable. I added just a bit more water (1/4 cup), covered the pan and allowed the kale to braise for 4 minutes. Remove the lid, season with salt & pepper and top with the crisp jowl.
You can always braise longer, depending on how tender you like the kale.

So how did we beat the "cold" in the end?


How 'bout dem dumplings?

JCG


Tuesday, January 15, 2013

The Roastest with the Mostest

Q: If you could only eat one meat for the rest of your life, what would it be?

A: Pork. Pork. And Pork.

Since relocating from NY to SC I have fallen in love with pig. There isn't a part of the animal I don't like. I've had my share of bland, poorly cooked pork chops but I've had many more lousy steaks and boooo-riiing chicken dishes in my life. Pork can be lean and clean--a blank canvas. It can be cured and smoked into lardon perfection, braised and peasanty. It can also be roasted and served to ohhs and ahhs (and "oh my goodness!" and "seriously??"). Hats off to Nathalie Dupree and Cynthia Graubart for this straightforward method of roasting an intimidating hunk of pork!

When planning my New Year's Day dinner, I wanted to capture the South at her finest. Hoppin' John and collards were a traditional no-brainer. Cornbread and sweet tea were there to keep it fun. A giant blade roast (tipping the scales at 10 lbs) was there to knock my guests socks off. It did, thanks to Mastering the Art of Southern Cooking. There are multiple recipes for pork roasts and I combined two for this roast. I had a massive piece of meat. MTAOSC's recipes are for 4-5 lb roasts, so I had to get thinking. Using the Slow-Cooked Pork Shoulder and the Braised Pork Shoudler recipes as a starting point, I was able to serve a mind-blowing pork roast.

The blade roast (aka Boston Butt, Pork Roast Butt) is from the upper shoulder (the lower being the "picnic" roast). It succulent and juicy throughout due to excellent marbling. Unlike many cuts of pork, it's almost impossible to overcook the blade. Low and slow (as cheesy as that is to say) will yield a perfectly moist and delicious roast. Unlike may beef roasts, pork blade roast seems to be self seasoned with flavor through and through.

My ten pounder would take approximately ten to twelve hours to get dead tender. So yea, I was still buzzing from the Eve when I yanked myself out of bed to get this baby cooking. Set on a 300 degree oven,  the smells begin permeating the house at about 2 hours, torturing yourself and your family until you think you are gonna rip open the oven door and start stabbing at crisp skin with wild abandon.

First, you must season. A ten pound roast can never marinate fully. You just can't penetrate that much meat. This can be a letdown with many beef and leaner pork cuts. Often a roast will crispy on the outside and well seasoned, while the center seems a bit dry and in need of a dunk in gravy or creamy horseradish sauce (not that there is anything wrong with that). You'll be thrilled with this roast's intense flavor and juiciness. It's the nature of this cut. No gravy required, although why let all the gorgeous drippings and fond (crusty deliciousness clinging to the roasting pan) go to waste?

Pork shoulder has a thick fat cap over the top. This can be removed prior to roasting, leaving a thin layer of moisturizing fat. This was a holiday after all, so I decided to score the fat in a diamond pattern using an incredibly sharp knife (you can use a VERY clean exacto knife for this). After roasting this layer of fat can be removed and set back in the oven to get super crisp (the beloved cracklin'!). Sure, you can't go snacking on crispy fat chips all year long but just one day seems acceptable, right?


(You can see the diamond scoring here. It doesn't stay that pretty, sealing itself back together. The scoring will prevent the skin from tearing as it contracts in the heat. Makes for much easier removal and cracklin' preparation)

I used that same sharp knife to poke whole garlic cloves into deep slits in the roast. With such a long, slow roast, the slits seal themselves back together and there are little garlic gems hidden within the meat.  I made a fresh and flavorful rub of sea salt, black pepper, fresh rosemary and thyme. Liberally season the meat, getting all sides (don't neglect the bottom!). 

Place the roast in a roasting vessel with at least an 2" lip to catch all the drippings. Into the oven it goes. I tented my roast for the first 7 hours, then removed the foil tent to crisp the skin for the remaining time in the oven. Utilize a meat thermometer here (145 degrees internally) but seriously, this one is hard to kill! If it is a bit over when you get to the temperature, not to worry. This is succulent pork!


Allow your roast to rest for a half hour before slicing. You can remove the cracklin' immediately and recover the roast. Cut the cracklin' skin into bite sized pieces and return to the oven to render and get super crisp! Keep an eye on it, you don't want to scorch them. Once crisp, remove from the oven and drain on paper towels or a brown paper bag. I love cracklin' sprinkled on my greens and hoppin' john. I am so hungry right now. 

As for gravy, hey, make it! You can easily set it aside and freeze for a day when you have some quick pork chops for dinner. It makes an excellent addition to most quick sauces and reductions! It's KILLER on mashed potatoes. Remove the roast from the roasting pan. Allow the pan to cool (you can speed this up by refrigerating) and skim off excess fat. Place the pan on your stovetop burners or back into a hot oven. Add some white wine, water, chicken stock (whatever really, the drippings are so intensely flavored, even water will do!) and scrape away the bits from the pan. I love a little squirt of dijon mustard in pork gravy but this is completely optional! Reduce the volume by half. To really cheat, add a sprinkle of Wondra flour and whisk well until desired consistency. You can always make a roux and add the strained drippings to create your gravy. Straining removes any solid flour or dirty looking bits and leaves you with pretty, silky gravy. 

Carving this perfectly is a bit of a challenge due to the shank, but the meat is so tender it won't be too difficult to figure out. I cut a wedge from top to shank and slice away. At evening's end, I pulled the remaining meat from the bones to reserve for South Carolina mustard based pulled pork sandwiches. This recipe isn't in MTAOSC, but I'll be posting anyway. It's just too good. 


(Pardon my photog skills, this was New Year's Day after all. I was blurry as well.)


This was just so delicious and satisfying. My Dad (who just celebrated is big 7-0, HAPPY BIRTHDAY DAD!) knows his meat. He quietly and profoundly said that this may be the best pork he has ever had in his life. 

'Nuff said. 

Happy New Year!!

-JCG


Wednesday, January 9, 2013

A Mess of Greens with Pot Likker

It's a crazy thing, but they (we?) don't eat greens in the North. Perhaps if you are at a Southern theme restaurant or lucky enough to have some friends with Southern roots, you'll score . Collard greens in particular are a hardy vegetable and could easily be grown in the North. I've heard from many reliable sources that a frost actually improves the flavor of collard greens. It's surprising that they aren't more popular. There is a bit of prep work involved with cooking a mess o' greens but collards are incredible nutritious and really delectable. And the likker, oh it's just scrumptious.

Like the "liquor" from oysters, "likker" is precious and full of flavor (especially for dunking cornbread).   It is the marriage of a broth made of simmering meat (typically pork, but really most any flavorful scraps will do) , a bit of onion, and in my case a hot pepper with a large quantity of greens. What starts out as a gigantic sink full of never ending collards cooks down into a slurpy, heady, delicious "mess of greens".

I buy collards at roadside stands here in the South for less than a dollar per pound. The leaves are giant and a beautiful, deep green. The "ribs" must be removed (along with the stems). You can save these for another preparation, as the tough stalks are not welcome in the pot today. Use a sharp knife and run it along each side the center rib. Stack the leaves on one another, roll up in a cylinder and slice 1-2" slices. You'll have nice ribbons (chiffonade) of collards. MTAOSC's recipe calls for five pounds of greens. It will fill up your sink for rinsing!


Mastering the Art of Southern Cooking suggests using salt pork, streak o' lean, smoked neck, or other cured pork. I had a nice amount of hog jowl left from Hoppin' John and I wasn't about to let it go to waste. I couldn't have been happier with the result. The well cooked pork slices were like buttah after a long simmer. WARNING: highly addictive, add a few extra slices for the cook.

Yup, hog jowl.

Hog Jowl is the cheek meat of the piggie that has been smoked and cured. The cheek meat is tough due to all that chewing muscle, but after the smoking and curing, it's delectable. You can use jowls as you would bacon. I fry it crisp for breakfast with an egg and biscuit. I use it to flavor soups and stews. It's wonderful for larding meatballs or meatloaves. It was an excellent lubricant for my Christmas Day country pate as well! A true perk to living in Charleston is the availability of hog jowl at the local supermarket. A good butcher or market can easily order this for you. It can be frozen, so get enough to keep you in jowls for a while.

Into a giant stockpot goes a a half gallon of water, onion, and a spicy cherry pepper. This is boiled for a half hour to make a flavorful base to cook the greens. Add the massive heap of greens to your stock and stir, pushing the greens below the hot broth. You'll be amazed at the volume change as the greens submerge! It becomes much more manageable in just a minute or so. Now you simmer for as little as an hour or up to three hours, depending on the maturity of the greens and your personal taste. I like my greens well cooked, nice and tender. I went the entire three hours, stirring occasionally. Vinegar is often found in collard greens. I love it but hate the way is discolors the vibrant green leaves, so I opt to serve hot chili vinegar and hot sauce along side the greens. Season the pot with salt & pepper. It can take quite a bit of seasoning, so don't be shy. Extra hot sauce is welcomed here as well.

You now have A Mess of Greens with Pot Likker (pg. 206 in Mastering the Art of Southern Cooking). Yay!

You can strain the greens and save the Likker for stock, or serve together with a savory cornbread for dunking. I gilded the lily and added rendered bits hog jowl as garnish. You can see the bits of meltingly tender jowl that stewed away with the greens as well as the crispy bits in the pic. Sigh.

This makes, as Ms. Dupree would say, "a gracious plenty" of greens that can be frozen.


ENJOY!

-JCG